Step 1: Make changes to the code locally:
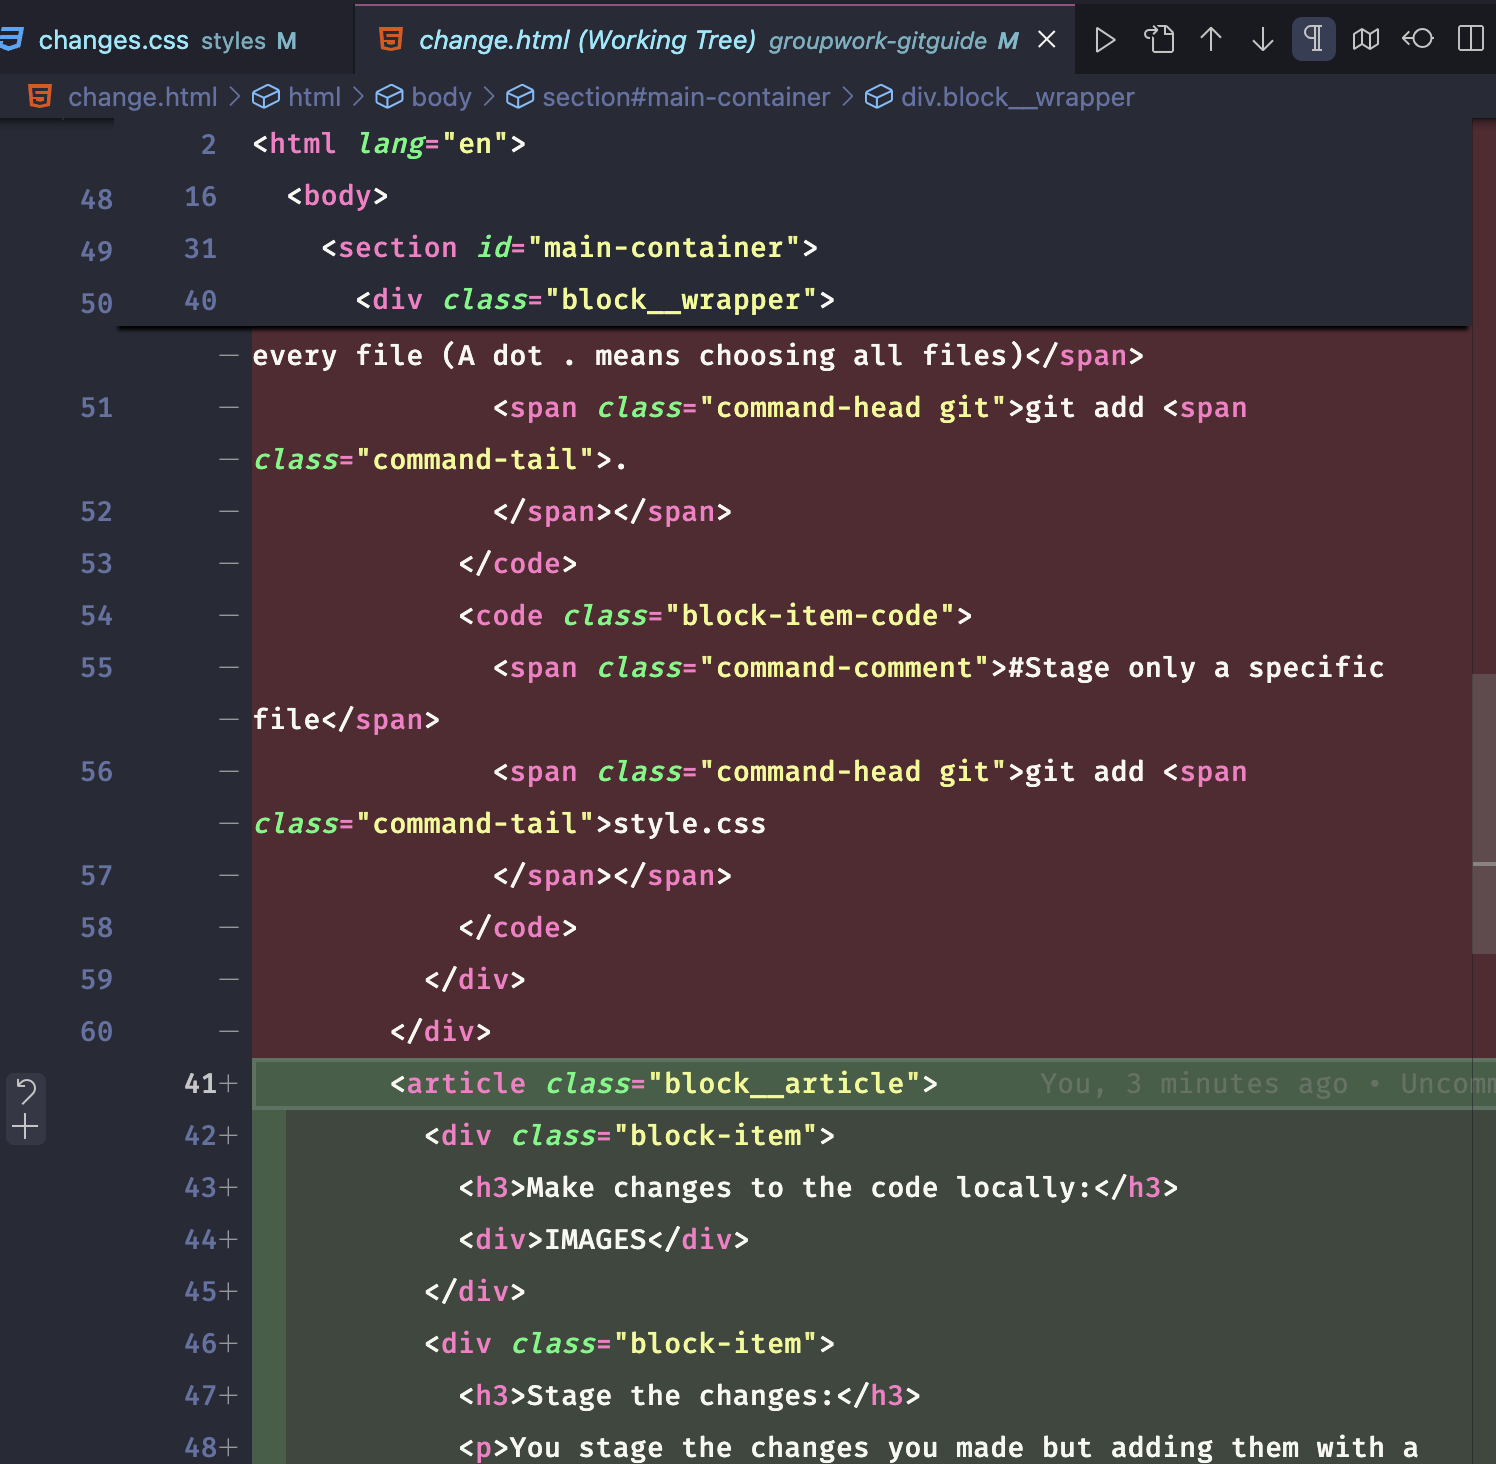
Green Highlight (New Changes):
The sections of the code highlighted in green represent the new changes that are about to be added. These lines of code were added or modified compared to the previous version.
Red Highlight (Old Changes or Deletions):
The parts highlighted in red are the old version of the code, or code that has been removed or replaced. In your screenshot, the red-highlighted code consists of Git command-related instructions and comments that have either been deleted or replaced with the new content.
Step 2: Stage the changes:
You stage the changes you made but adding them with a simple command below
                #Stage all changes in every file (A dot . means choosing all
                  files)
                git add .
                #Stage only a specific file
                git add style.css
Step 3: Commit the changes:
A commit creates a checkpoint in the project's version history, allowing you and others to track the evolution of the code over time. It is practical to write a meaningful committing message to each commit.
                git commit -m
                  "commit message"
Step 4: Push the changes to the main branch:
Your changes will be updated on Github in the main branch.
git push origin main
After pushing, your terminal might look like this...
                Enumerating objects: 5, done.

                Counting objects: 100% (5/5), done.

                Delta compression using up to 4 threads

                Compressing objects: 100% (3/3), done.

                Writing objects: 100% (3/3), 317 bytes | 317.00 KiB/s, done.

                Total 3 (delta 1), reused 0 (delta 0)

                To https://github.com/username/repository-name.git
                5f29a3a..d9b66e7 main -> main